Hi Guys! Want to start experimenting with Upcycling? Reclaimed scaffold boards are perfect for upcycling into a variety of items including tables, benches, shelving, garden planters and outdoor furniture. Not only this but they can be used for wall cladding, flooring & decking. They are solid, much cheaper than sawn timber and are extremely hard-wearing and versatile! Using scaffold boards that have already served a purpose in the construction industry, helps reduce unnecessary waste and deforestation – you also know that each board is completely different, making all your furniture unique! Plus it is great fun having a go yourself, and getting your hands dirty! Fancy giving it a go? Here’s how…
What you’ll need…
- 3 x reclaimed scaffold boards for the table top– (size 150cm long x 22cm wide x 3.8cm deep)
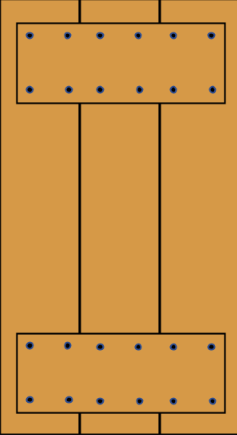
- 2 x reclaimed scaffold boards to secure the boards together underneath at each end– (size 60cm long x 22cm wide x 3.8cm deep)
- Electric sander (80-100 grit sandpaper)
- Drill with 3mm wood drill & screwdriver
- 24 x Screws (size 50mm long)
- Set of Hairpin legs in your choice of colour (71cm high)
- Beeswax in your choice of colour & a lint free cloth/rag (you can paint the table or varnish/oil if you would prefer)
- Wood Glue (Gorilla Glue is best)
- 2 x Clamps (36 inches)
It all costs under £100..
- Scaffold boards £22.80
- Screws: £1
- Hairpin legs (raw steel): £50
- Beeswax: £15
- Glue: £4
TOTAL: £92.80 – PRETTY CHEAP FOR A TRENDY 4-6 SEATER DINING TABLE!
Step 1: Source your Scaffold Boards & Legs
Have a look on somewhere like Friday Ad or any other place that sells DIY materials for a good price. Sometimes people give these away as ‘Free to collector’ items too so you might get lucky, in any case they shouldn’t be expensive – normally £1.20 per ft). If you don’t see any, set up an alert so you can pounce on any good ones that come up. They will look weathered and possibly be different colours in different places but that’s ok as long as the wood is not split, broken or warped – the flatter the better!
Hairpin legs are widely available online, and normally come with fixings and small plastic feet protectors. The cost can vary depending on colour. You can find them for a very good price on a number of online sites but the basic raw steel legs are approximately £50. You can find these on Upcycle UK.
Step 2: Get Sanding
We recommend a handheld electric sander to speed this up but of course with a little grit (get it?) and elbow grease you can do this by hand as well. (If you want to go electric but you don’t want to fork out for brand new have a search on Friday Ad for sanders to see if anyone is looking to offload their old one).
You want to sand 3 sides of the boards, the top and the edges (this is to ensure they butt up together nicely), as well as the ends. It is up to you how much you want to sand the top of the boards, depending on how rustic you would like the table to look! You do not need to sand the underneath of the boards!
Step 3: Gluing & Joining the table
You need to lay the boards out on a flat surface and arrange them so they lay/butt together in the best way, this may take some trial and error as all the boards will be slightly different! The boards also need to be level at each end.
Once you have decided on the configuration of the boards, you need to glue them together – this can be rather messy so ensure you are on a wipeable surface or use a dust sheet underneath, rag or paper towels will also come in handy at this point!
The best way to do this is gluing one board at a time, ensuring you use a generous amount of glue along the edge of both the boards. It is best if you wipe excess glue as you go, especially any that has run down underneath between the boards, as this will reduce the need for as much extra sanding! If you have time, clamp the boards as you glue them together and leave them to dry for a few hours/overnight as this will make the process easier, and prevent movement in the boards. Alternatively, you can glue and clamp all 3 boards together in one go. Once the table has been completely glued together, leave it to fully dry for a day or 2.
Step 4: Finishing touches!
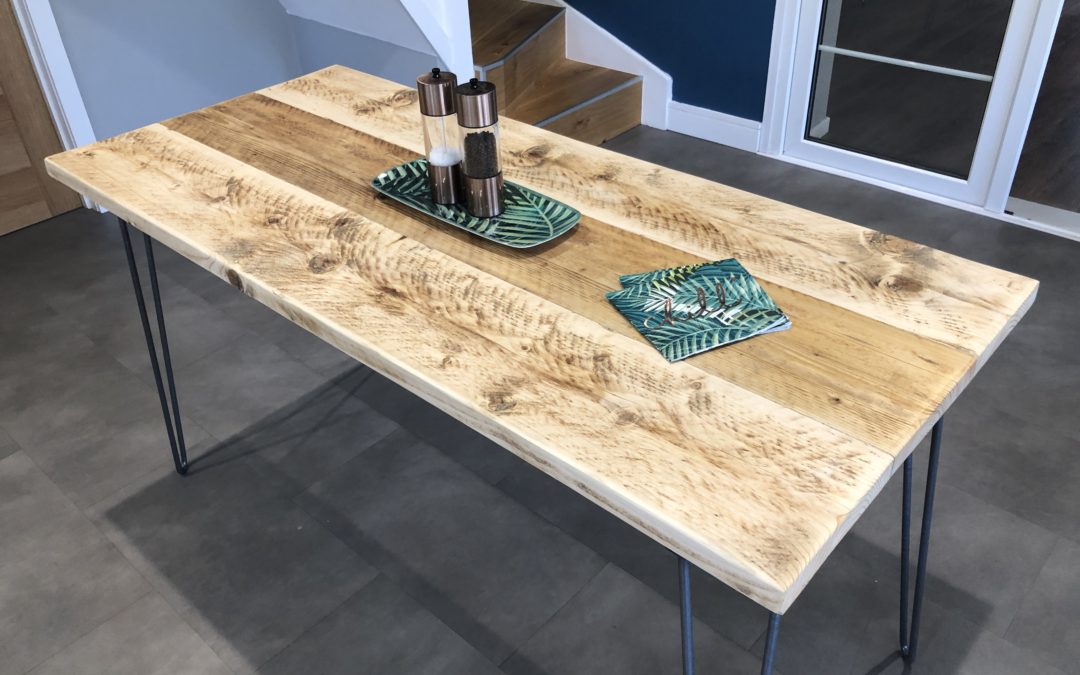
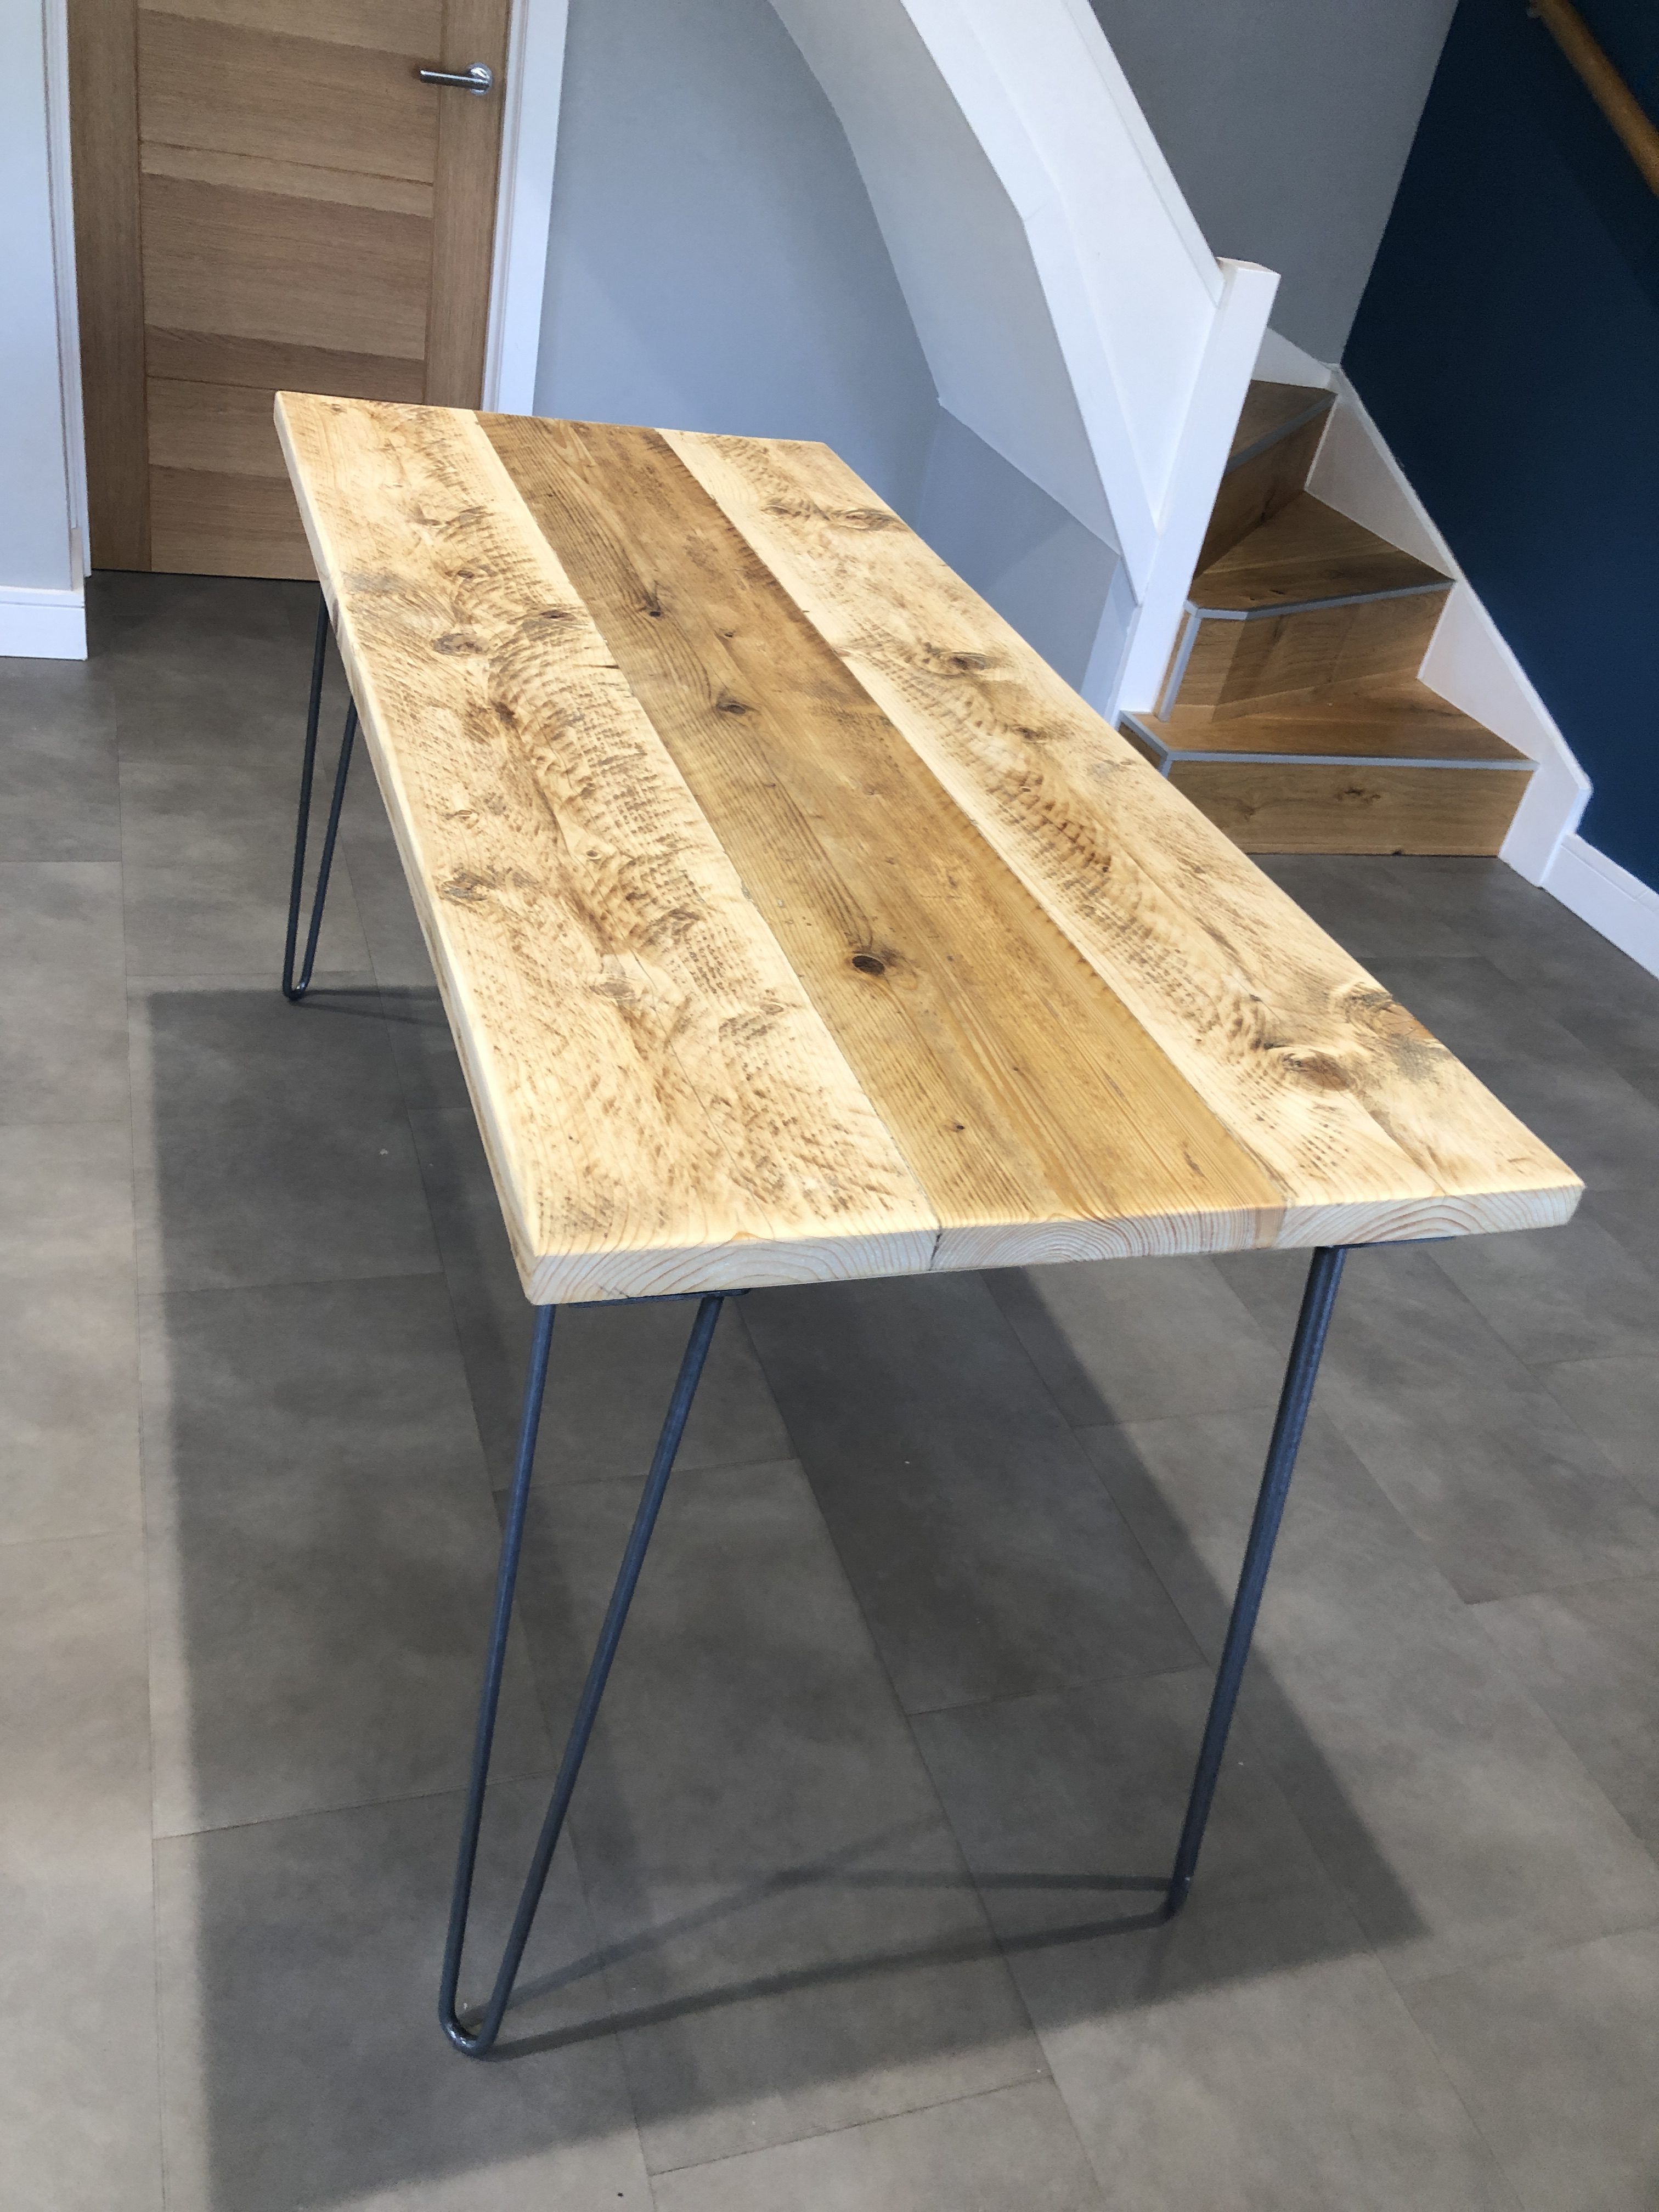
Attach the hairpin legs to the underneath of the table, it is best to attach these onto the corners of the supporting 60cm long boards. The screws for these are normally supplied, with the legs. Again, use your 3mm drillbit to pre-drill the holes.
Once done, turn the table back over – 2 PERSON JOB! Give the tabletop another sand over if required to remove any excess glue.
Use a rag/cloth to wipe off any dust from the table top. You can now apply the beeswax following instructions on the tin.
Pro Tip: For extra protection, you can finish off your table with an acrylic table top protector. Sites like Cut My can make these cut to size.
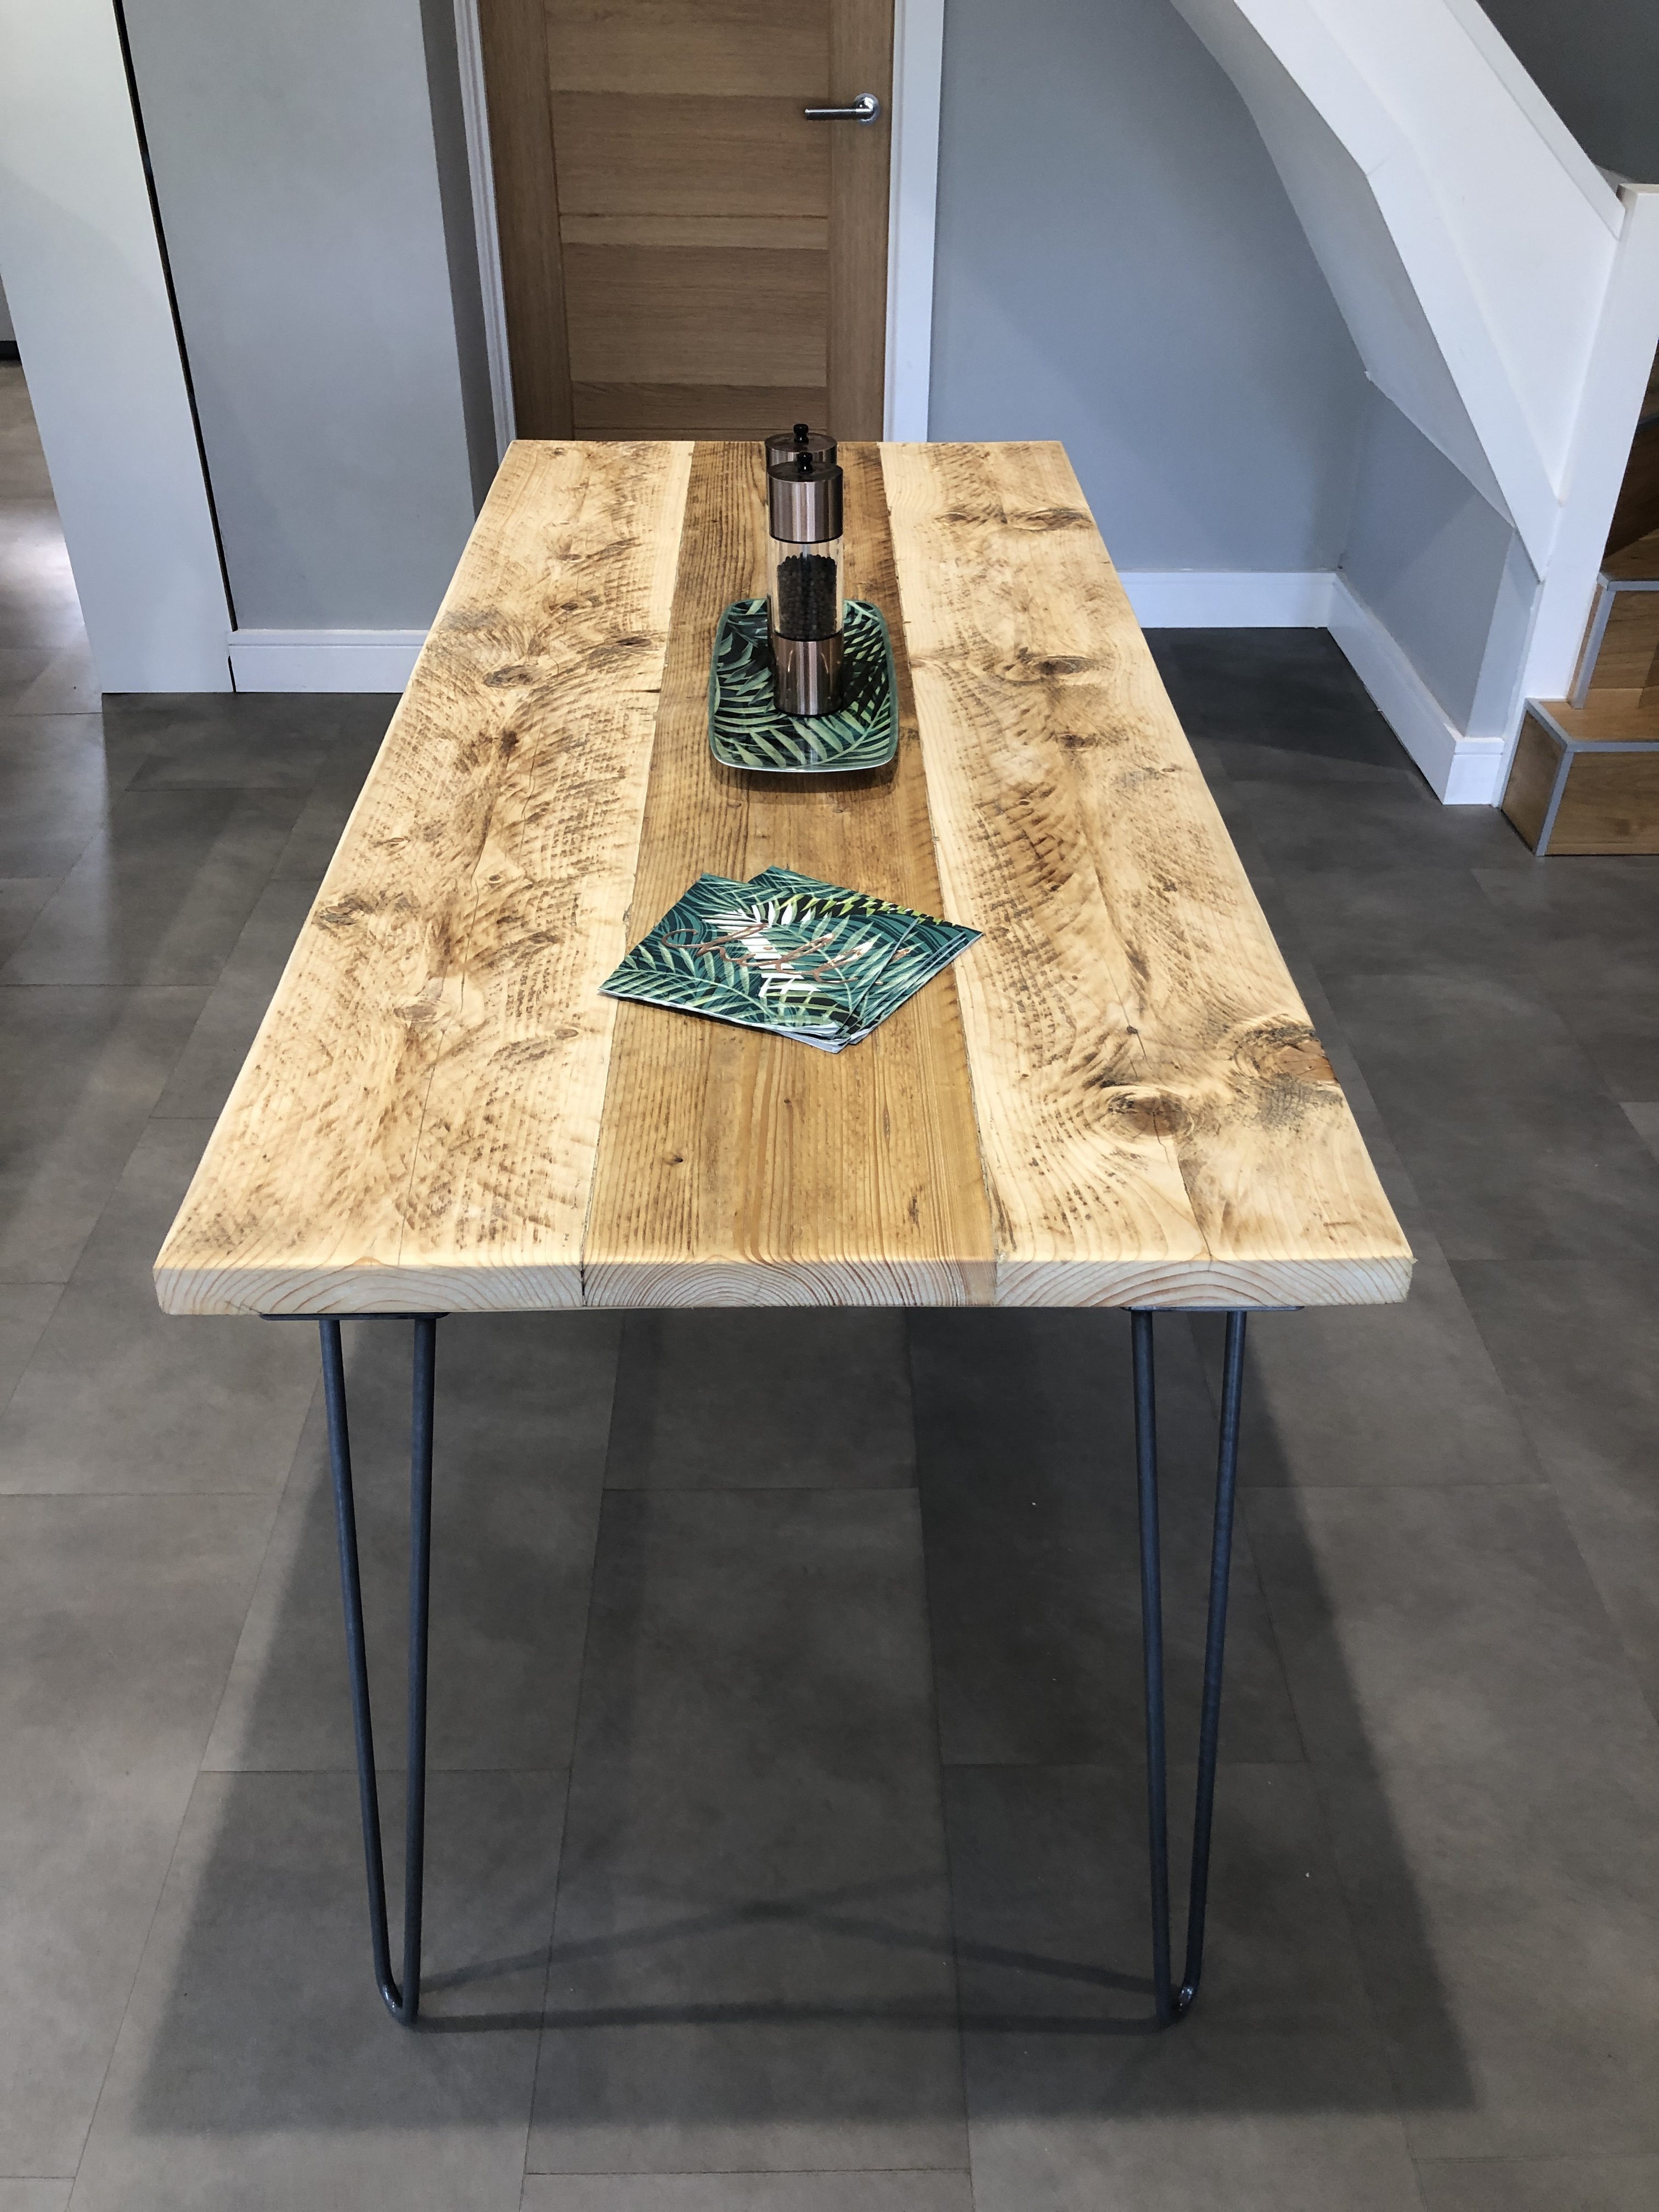
Voilà! Your finished masterpiece…
Looking for Upcycling materials?
If you love the look of upcycled furniture, but would prefer us to make it for you, Upcycle U.K also produce bespoke tables, benches, shelves and other furniture, all made from their reclaimed scaffold boards.
For more upcycling ideas and inspiration, visit and follow us on Instagram where we’ll be celebrating national #UpcyclingDay with related posts. Looking for materials for your upcycling projects? Find second hand bargains in your local area on Friday-Ad, from clothes to furniture, pallets, tools and more..